Dimensions let you plan one account at a different level of detail — Advertising by department, Rent by location — while the account row shows the roll-up.
Set up dimensions
Create dimensions on the Dimensions page under Setup. Each has a type (department, location, cost center, project, or a custom type), a code, and a name. A company with no dimensions of its own has a single Default dimension that every value lands on.
Choose what you are editing
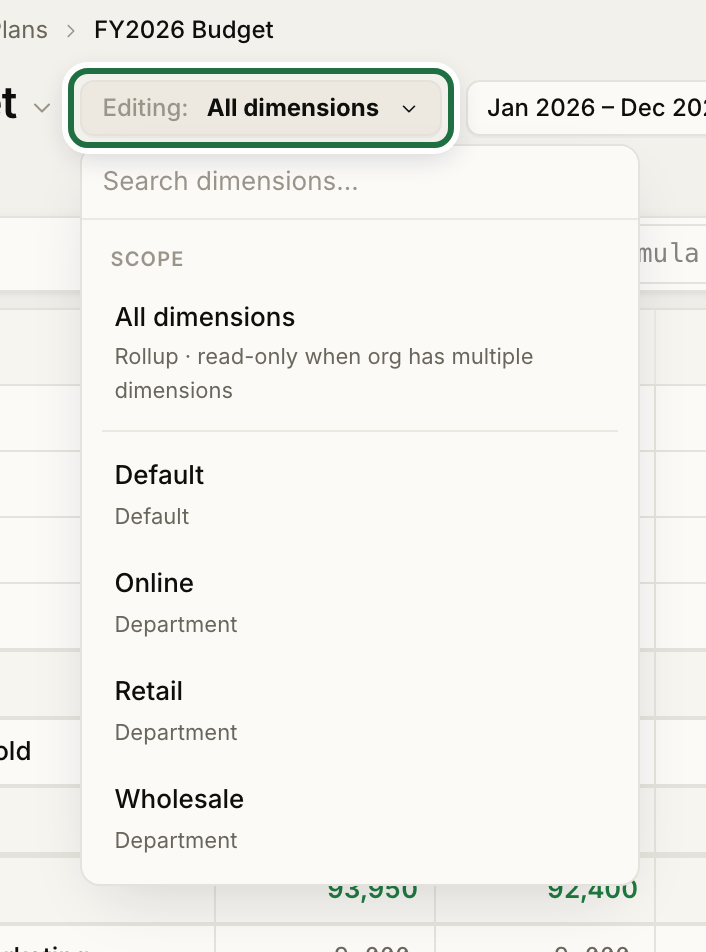
The Editing: dropdown at the top of the grid sets the scope:
- All dimensions shows the roll-up. When the company has more than one dimension this view is read-only, because a value typed here has no single dimension to land on.
- Pick a dimension to edit that dimension's values. The grid shows only that dimension's numbers, and formulas can use
@selfto stay scoped to it.
Drill into one account
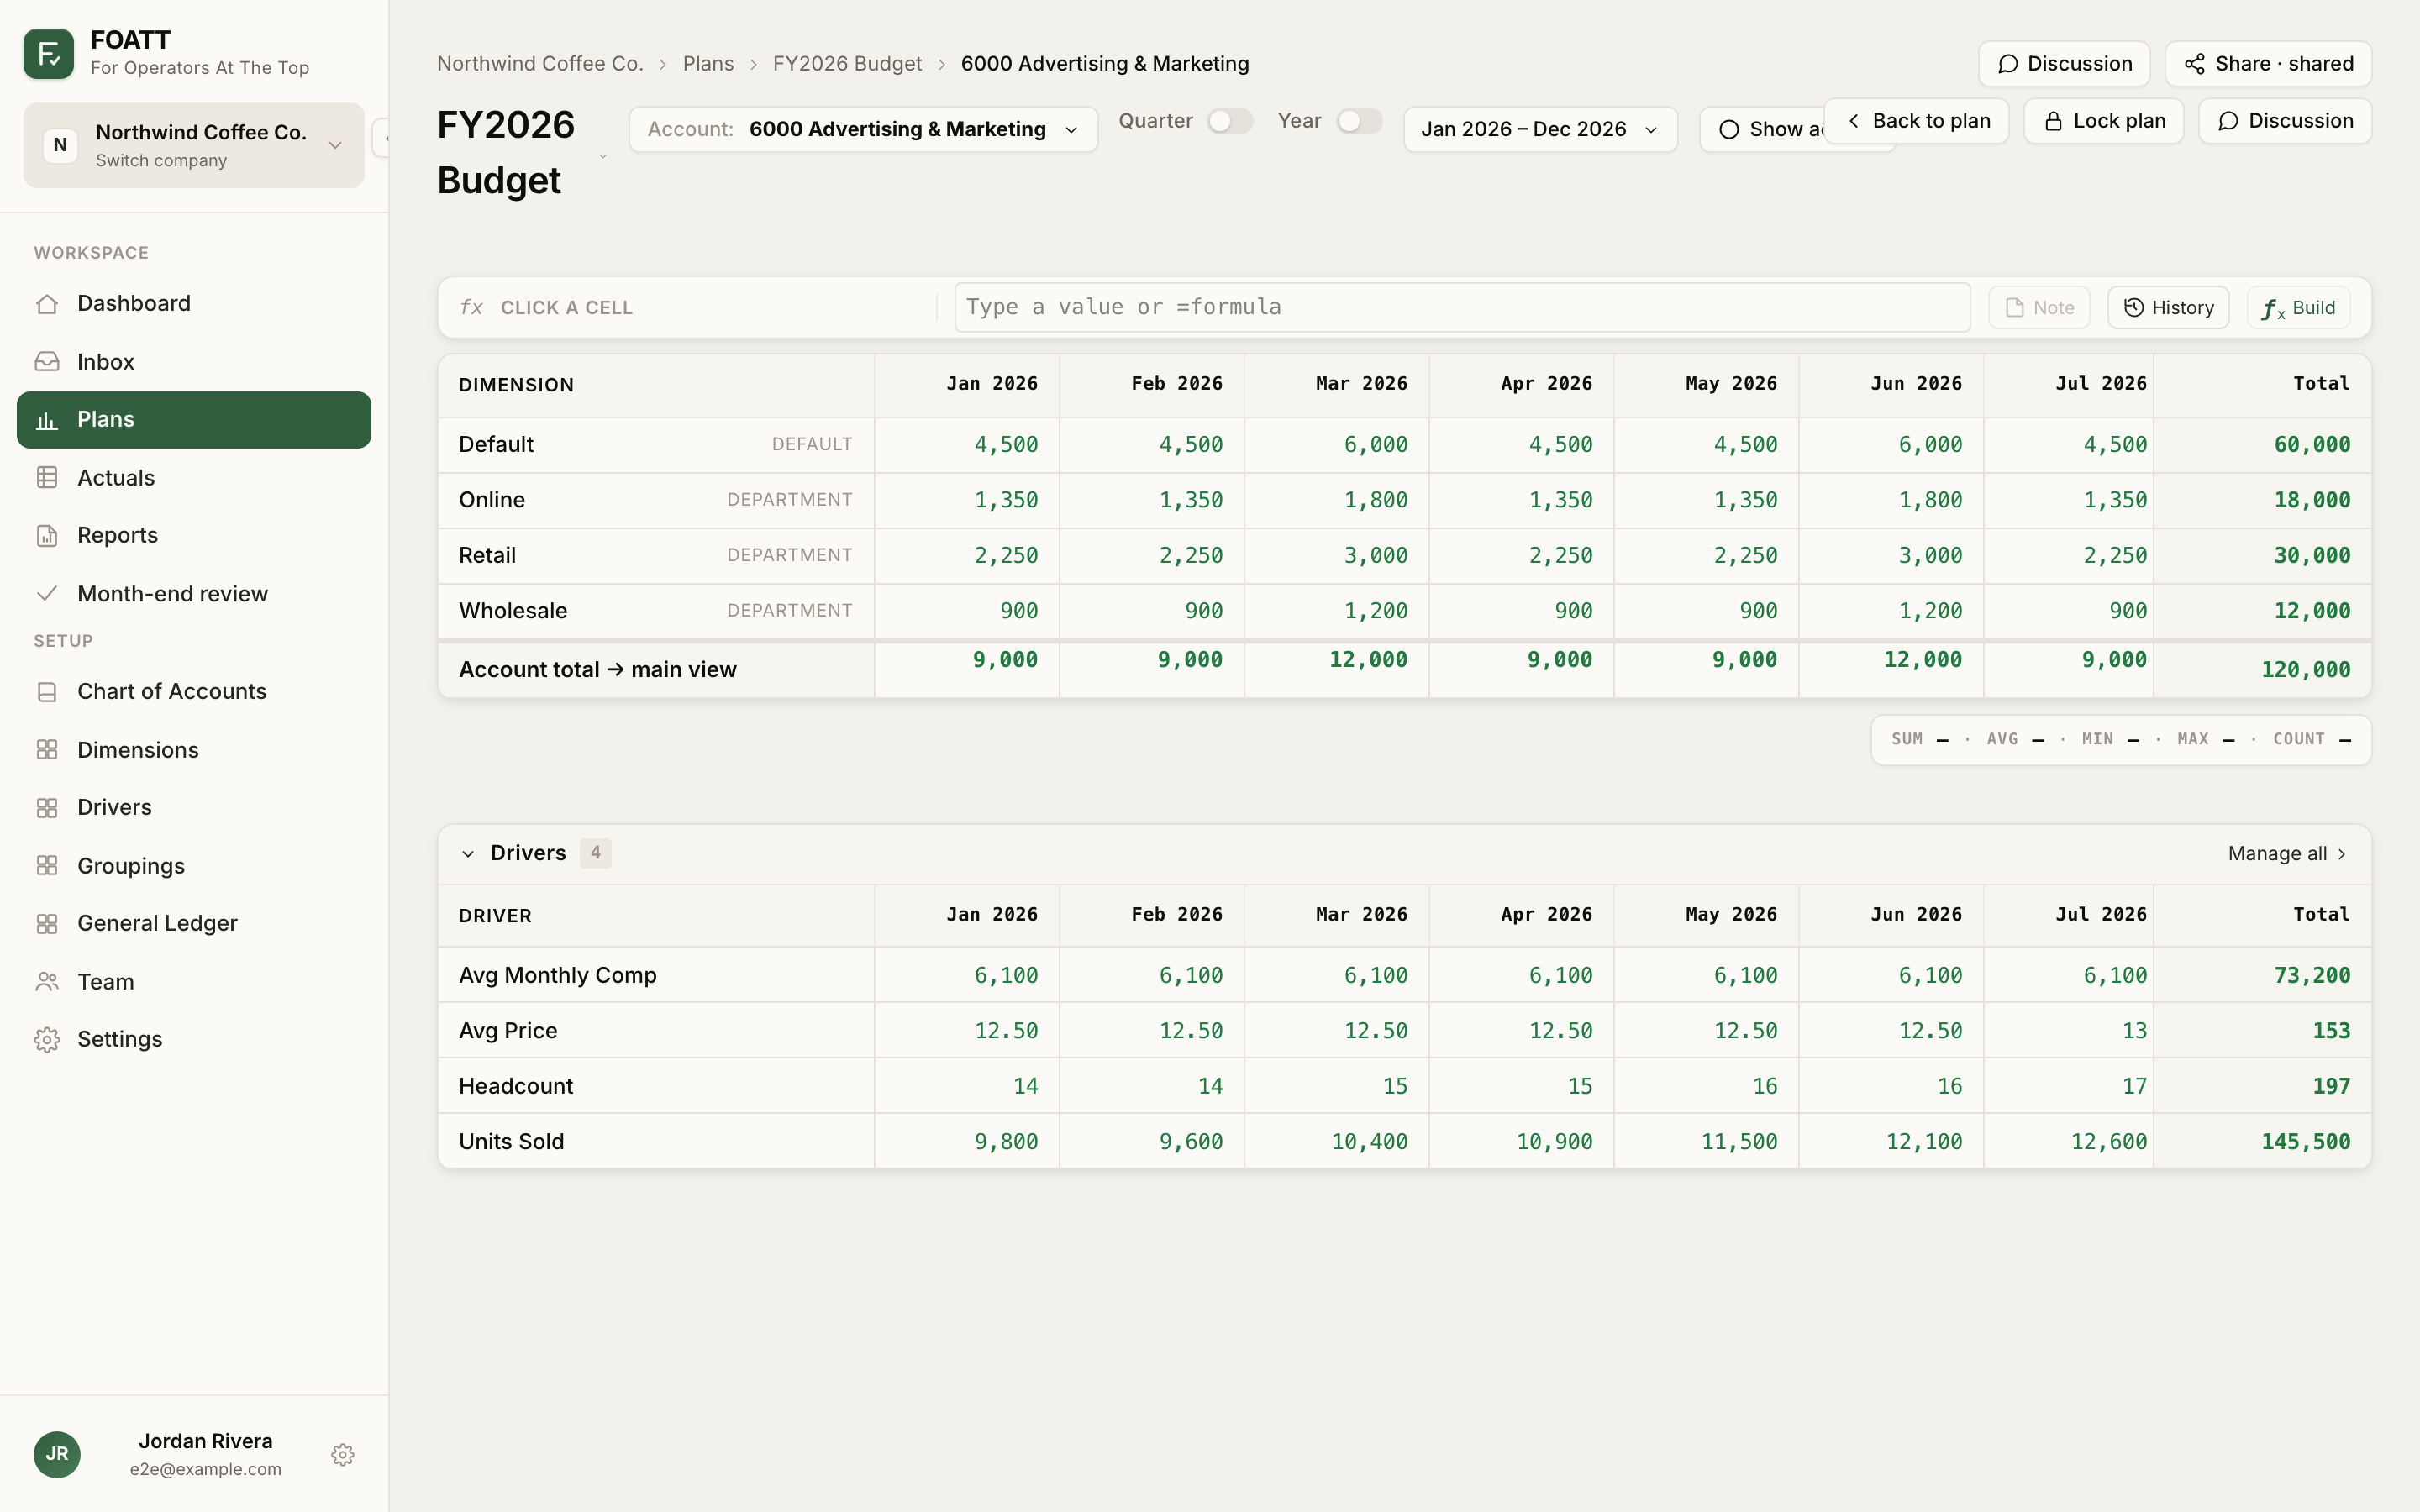
Click the chevron next to an account name to open its breakdown page: one row per dimension, plus a totals row. It supports the same keyboard navigation, formulas, right-click menu, and history as the main grid. This is the fastest way to spread one account across departments.
Reference a dimension in a formula
=4000@Retail!May       Sales Revenue for the Retail dimension in May
=6000@self![M-1]       last month's value in the same dimension as this row
The part after @ matches the dimension code first, then its name.
Slices
A slice is a combination of dimension values, such as Department: Sales · Location: NYC, defined once at the company level. Slices appear in the Editing dropdown under Custom slices and as rows on the account breakdown page, so you can plan a multi-dimension combination directly. Slices are available on Pro.
Access
Users whose role is limited to specific dimensions see only those in the dropdown and never see the cross-dimension roll-up.